Liquid Glass
Installation, parameters, quality modes, and known issues for the Liquid Glass plugin.

Installation
Download the latest Liquid Glass zip from your dashboard at toolsformotion.com/dashboard. Unzip it. Inside you will find a Windows folder and a Mac folder, each containing a ToolsForMotion folder ready to drop into After Effects.
Windows
- 1
Quit After Effects
- 2
Open File Explorer and navigate to:
C:\Program Files\Adobe\Adobe After Effects [version]\Support Files\Plug-ins\ - 3
Drag the ToolsForMotion folder from the Windows folder into the Plug-ins folder
- 4
Restart After Effects
Replace [version] with your After Effects version, e.g. "Adobe After Effects 2026". If Windows asks for admin permission to copy the folder, that is expected.
Your final path should look like this:
C:\Program Files\Adobe\Adobe After Effects 2026\Support Files\Plug-ins\ToolsForMotion\LiquidGlass.aex
Mac
- 1
Quit After Effects
- 2
Open Finder and navigate to:
/Applications/Adobe After Effects [version]/Plug-ins/ - 3
Drag the ToolsForMotion folder from the Mac folder into the Plug-ins folder
- 4
If macOS blocks the plugin, open System Settings > Privacy & Security, scroll down, and click Open Anyway next to the LiquidGlass message
- 5
Restart After Effects
Replace [version] with your After Effects version, e.g. "Adobe After Effects 2026".
Your final path should look like this:
/Applications/Adobe After Effects 2026/Plug-ins/ToolsForMotion/LiquidGlass.plugin
Mac: alternative install if Liquid Glass doesn't show up
On some Mac setups, After Effects doesn't scan plugins inside the ToolsForMotion subfolder. If the effect doesn't appear under Effect > ToolsForMotion > Liquid Glass after the steps above, try installing it directly into the Effects folder instead:
- 1
Quit After Effects
- 2
Remove the ToolsForMotion folder from /Applications/Adobe After Effects [version]/Plug-ins/ if you copied it there
- 3
Open the Mac folder from the download and copy just LiquidGlass.plugin (not the ToolsForMotion folder)
- 4
Paste LiquidGlass.plugin into:
/Applications/Adobe After Effects [version]/Plug-ins/Effects/ - 5
Restart After Effects
Your final path with this alternative will be:
/Applications/Adobe After Effects 2026/Plug-ins/Effects/LiquidGlass.plugin
The effect will appear under Effect > ToolsForMotion > Liquid Glass exactly the same as the recommended install. If both options fail, email support@toolsformotion.com.
Once installed, the effect appears under Effect > ToolsForMotion > Liquid Glass in After Effects. Alternatively you can search it in the Effects and Presets menu.
First Effect
Five minute walkthrough to get a usable glass effect on screen.
- 1
Create a new comp with a colourful background. A gradient, photo, anything with detail.
- 2
It's best to pre-comp your background layer and do any animation, transforms, colour grading, or adjustments inside the pre-comp. The plugin samples the source layer's raw pixels, so anything applied outside the pre-comp won't show through the glass.
- 3
Add a shape layer on top of the pre-comped background. A circle, pill, or rectangle works.
- 4
Apply Effect > ToolsForMotion > Liquid Glass to the shape layer.
- 5
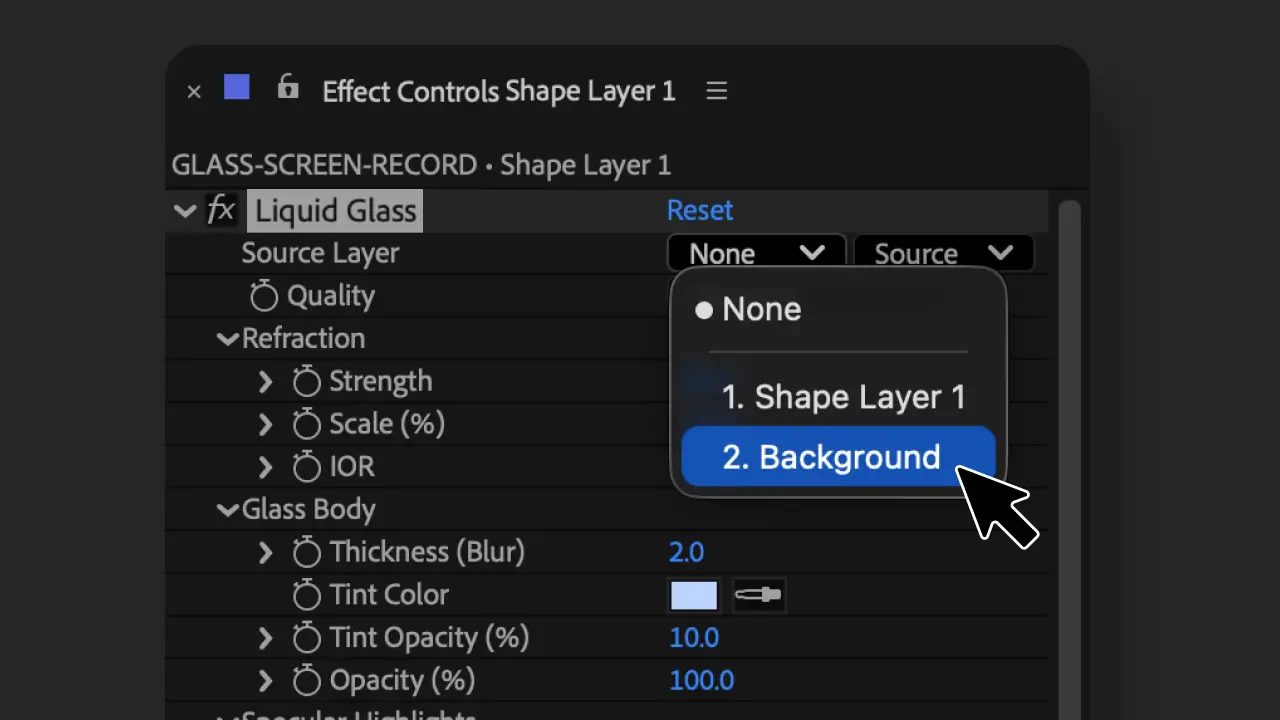
In the effect controls, set Source Layer to your background pre-comp.
- 6
The shape now refracts the pre-comp through it.
Default settings give a usable look. From there, tweak Refraction Strength, Specular Intensity, and the Shadow group to taste.
Parameters
Source Layer
The layer you want to refract through the glass. Usually the layer sitting directly underneath your shape in the comp.
Best practice: always pre-comp the source layer and do all your animation, transforms, and colour grading inside the pre-comp. Liquid Glass samples the source layer's raw pixels, so any effects, position changes, or colour work applied to the layer in the parent comp will not show through the glass.
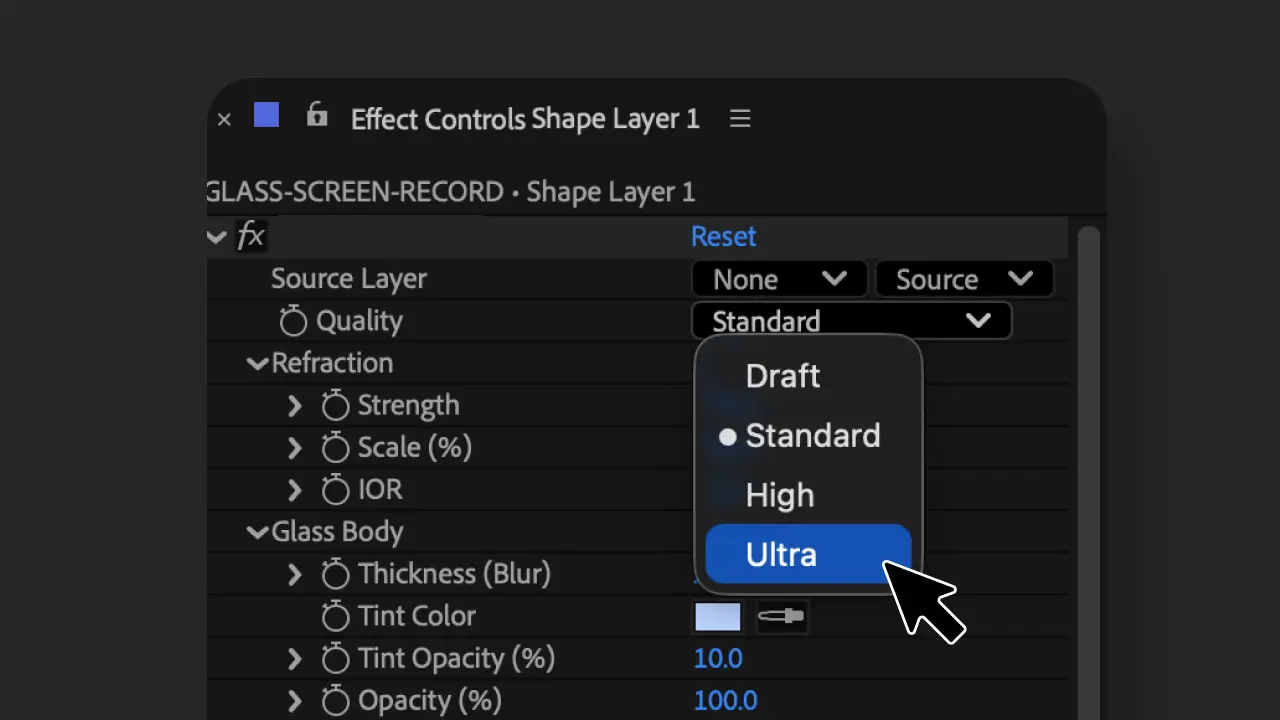
Quality
- Draft: fastest, blocky, for scrubbing
- Standard: default, what you will use most of the time
- High: cleaner edge sampling, slightly slower
- Ultra: supersampled, much smoother edges, roughly 4x slower. Use for final renders.
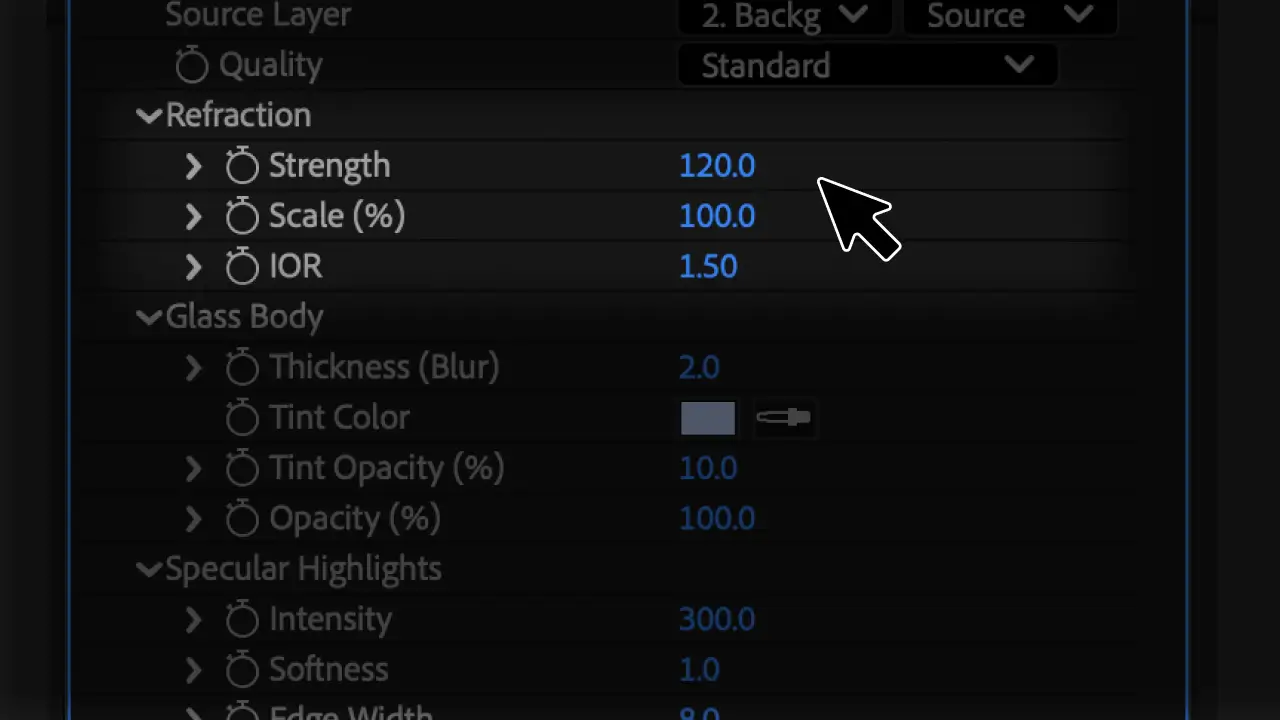
Refraction
- Strength: how much the background warps inside the glass
- Scale: how far inward the glass effect reaches. Push past 300 for a ball lens look. Lower values give a flat-glass feel.
- IOR: index of refraction. Higher values bend more. 1.0 is no refraction, 1.5 is typical glass, 2.4 is diamond.
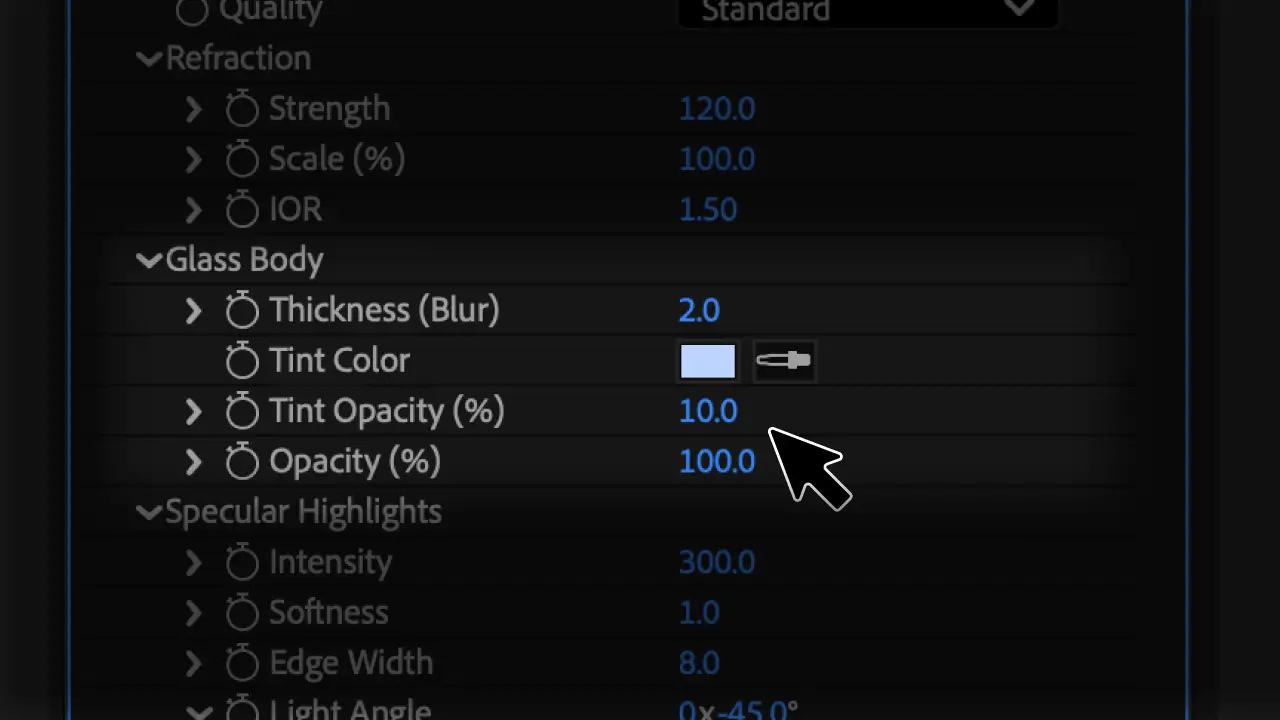
Glass Body
- Thickness: soft blur on the refracted content (frosted glass feel)
- Tint Color: tints the glass body
- Tint Opacity: how much tint to mix in
- Opacity: overall opacity of the glass
Specular Highlights
- Intensity: brightness of the rim highlight
- Softness: blur on the highlight (matte vs polished)
- Edge Width: how thick the rim band is
- Light Angle: direction the light comes from
- Light Color: tint of the highlight
- Highlight Distance: how far the highlight wraps around
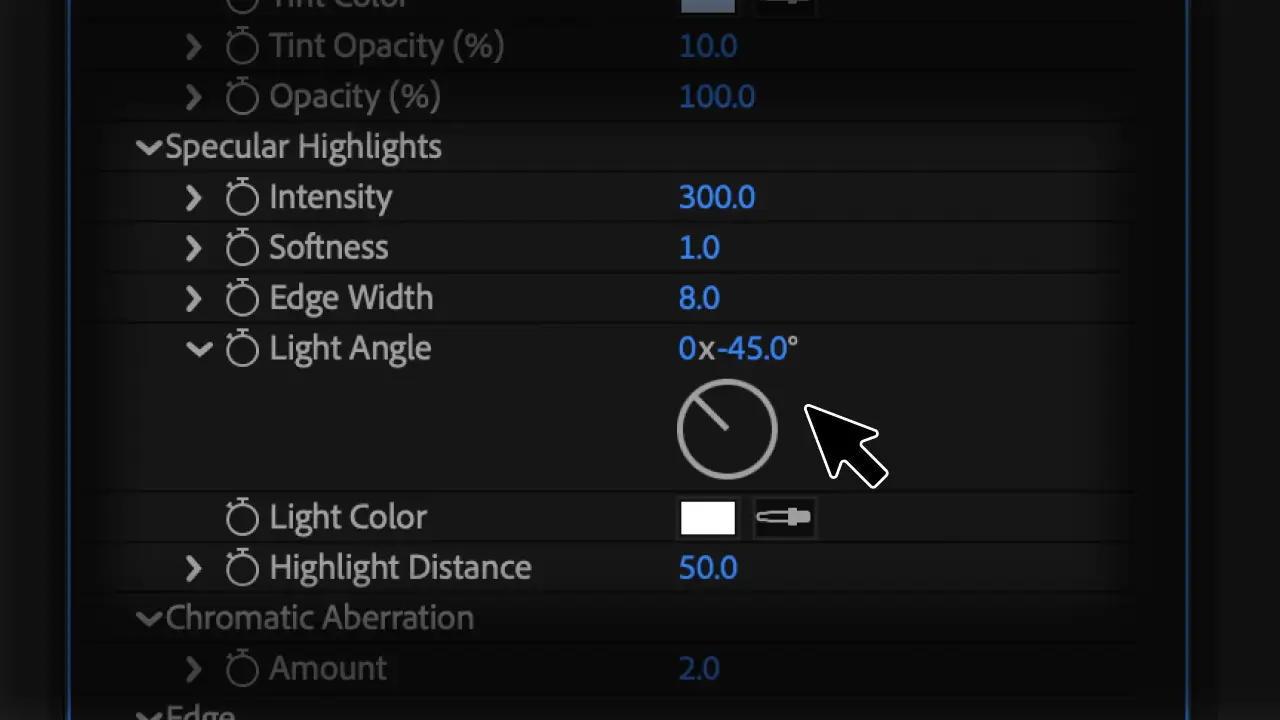
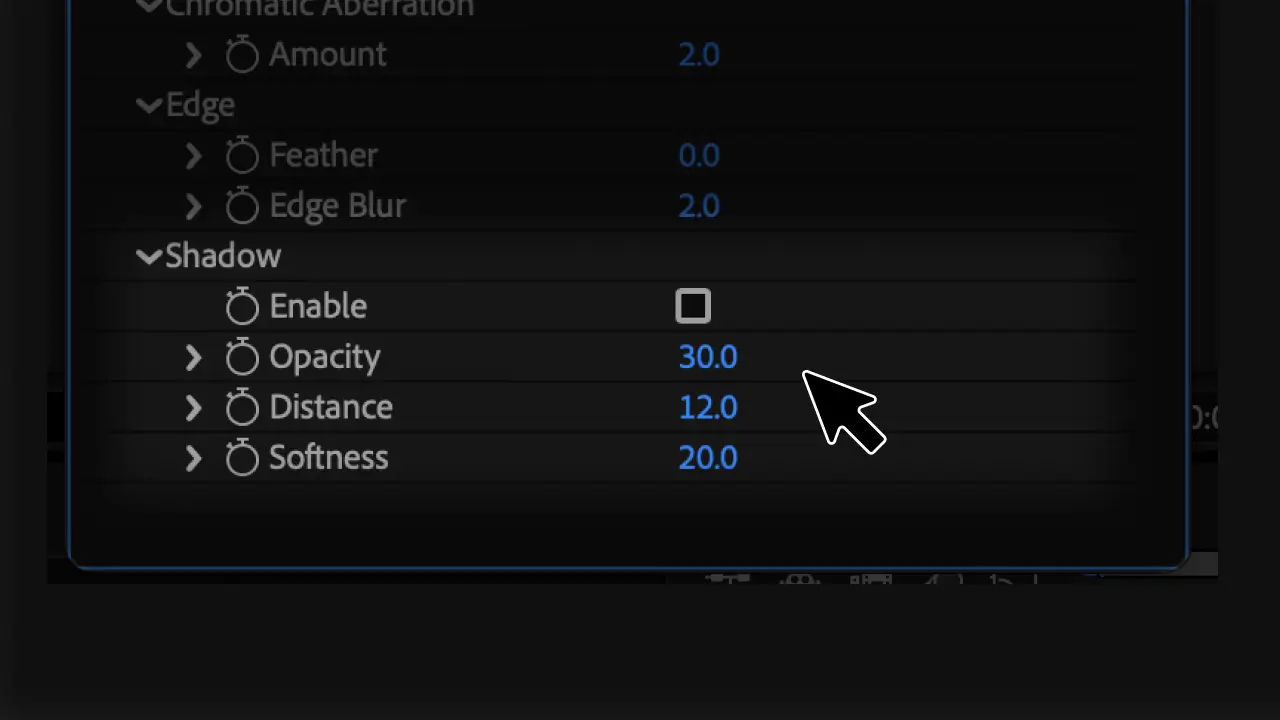
Chromatic Aberration
Amount: RGB split. A little goes a long way.
Edge
- Feather: softens the very outer edge of the glass shape
- Edge Blur: localised blur on the rim only
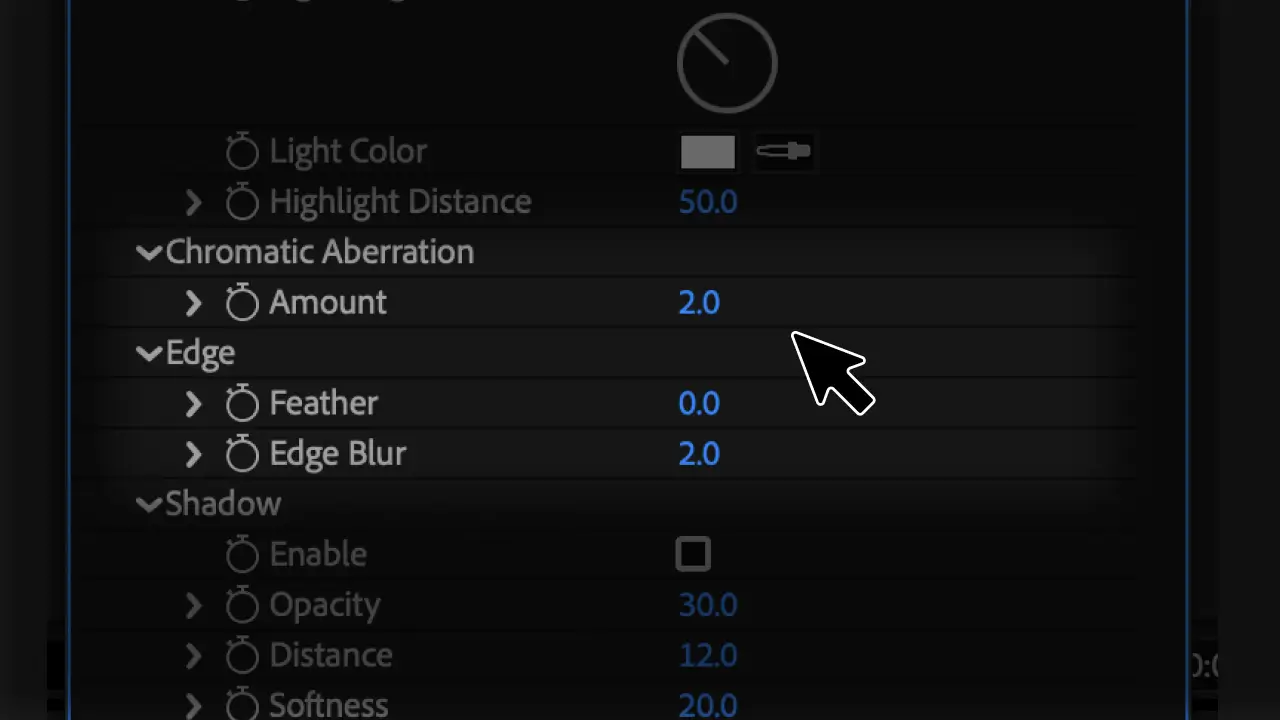
Shadow
- Enable: off by default. Turn on to add a refractive shadow.
- Opacity: how dark the shadow is
- Distance: how far it falls from the shape (light-angle aware)
- Softness: gaussian blur on the shadow
Quality Modes
When to use which quality:
- Draft: scrubbing the timeline, getting the look right, fast iteration
- Standard: most working sessions, RAM previews
- High: detail work where you want cleaner sampling
- Ultra: final render only. Comp render time goes up roughly 4x.
Recommended workflow: tune at Standard, switch to Ultra before final export, switch back to Standard while working again.
Known Issues
Source layer effects and animation not showing through the glass
Liquid Glass samples the source layer's raw pixels. Any colour grading, transforms, position changes, or effects applied to the source layer in the parent comp will not show through the glass.
Workaround: always pre-comp your source layer and do all your animation and adjustments inside the pre-comp. Then point Liquid Glass's Source Layer dropdown at that pre-comp. This is the single most common gotcha, so make it your default workflow.
Shape extending past comp bounds
The plugin reads alpha cropped to the comp. When a shape extends off-frame, the rim geometry breaks. Workaround: pre-comp the layer at 1.5x to 2x the comp size, apply Liquid Glass inside, then bring the pre-comp into the final timeline.
Frame rate mismatch causes 1-frame flicker
If a pre-comp containing Liquid Glass runs at one fps and is nested in a parent at a different fps, AE's frame blending produces flicker every few frames. Match the frame rates, or disable Frame Blending on the nested comp (right-click > Time > Frame Blending > Off).
Aggressive shape morph animation can shift refraction direction
If you are keyframing a shape's underlying geometry (rectangle width 0 to 100, big shape morphs), the refraction of static content behind the glass can shift mid-animation. Position, scale, and rotation animations are fine. Slow morphs are mostly fine. Aggressive morphs are the edge case.
FAQ
Is it really free?
Yes. Personal use, commercial use, paid client work, all fine. Just don't redistribute or repackage it.
Does it work in Premiere?
No. After Effects only. Premiere uses a different effect API.
What AE versions does it support?
Built against AE SDK 25.6, tested on AE 2026. Older versions may work but are not officially tested.
GPU acceleration?
No, CPU only. Supporting every kind of GPU reliably would be months of work, which isn't viable for a free release.
32-bit float support?
Works in 32-bit comps, but renders at 16-bit internally. Won't break HDR projects, but extreme highlights inside the glass will be clipped.
Need help?
Contact support@toolsformotion.com